Combat
Andrew Dysonian of ASL bought a 6" version of the Liberty Ducted Quad to use as a combat quad. It wasn't totally perfect for combat, but its ducts serve as prop guards for clashing, as well as keep the props from tangling in the nets. When Marque Cornblatt got in touch to buy a couple more, the three of us got to chatting.
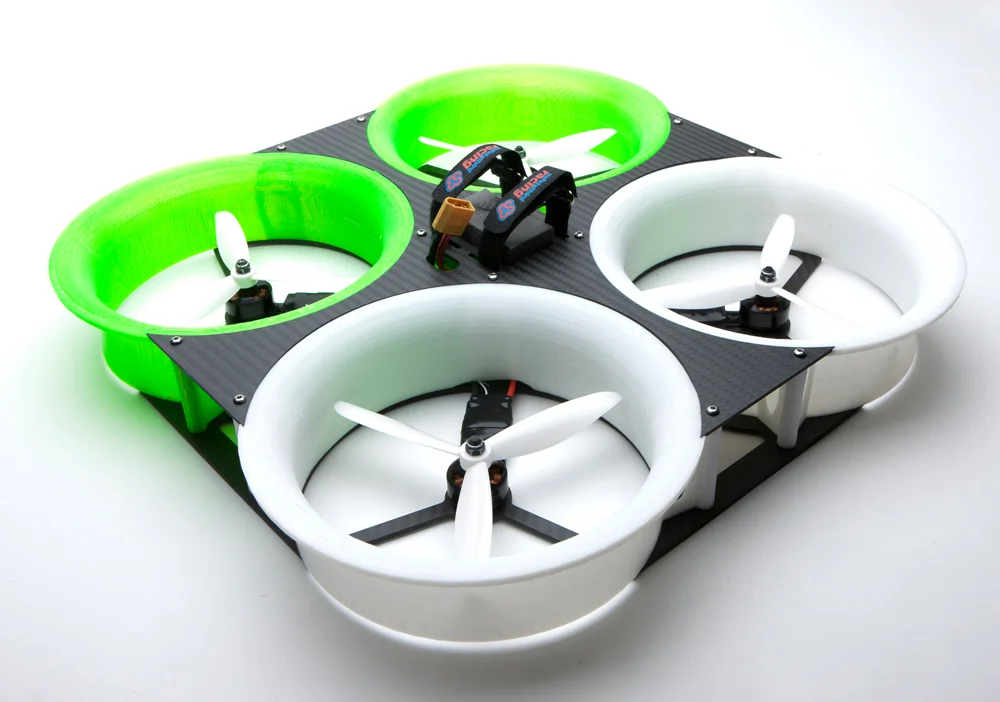
The LDQ6 is yuge.
ASL was looking to update its stock combat frame, the Hero. They could use the 6" LDQ, but I thought it'd be smarter to design something better from the ground up. My first thought was to try something molded, like the Hero, but Marque pointed out that tooling costs for molds are exorbitant. Andrew wanted to save weight by removing the inner parts of the ducts so they're just prop guards. The ducts offset their weight by creating extra thrust, so we'll have to shave a good bit of weight. LDQ's have two huge and expensive carbon plates, which is not ideal for a basher. I wanted to make something as DIY and inexpensive as possible.
So we're talking about a 6" quad that's somewhat modular, with attachment points for weapons. Obviously it has to be strong, but if the prop guards could act as shock absorbers the hard edge of impacts can be lessened. The biggest challenge was the propguards: how do you suspend them beyond the props without adding a lot of weight, and how do you make them rigid enough to not easily bend into the props, while being flexible enough to be durable and act as bumpers. Finally, I wanted to break up the frame into smaller parts that are cheaper to produce, and I wanted fewer different parts so you don't need to stock a lot of spares. Here's what I came up with.

The holes in the guards weakened them too much, so I shaved weight by reducing infill on the print instead.
So it kinda looks like an octocopter, but really it's a quad with 8 identical arms. 4 of them hold motors, 4 hold pillars that propguards slip over. The FC mounts to the bottom plate, and if you use an aio board there'd be just one board, low enough to fit in the recess between the plates. LOS quads are so minimal!
There's an optional top plate for mounting weaponry. The battery can go below the bottom plate, above the FC, or over the top plate.
Bonus feature: remove the 4 extra arms and it's a simple LOS quad.
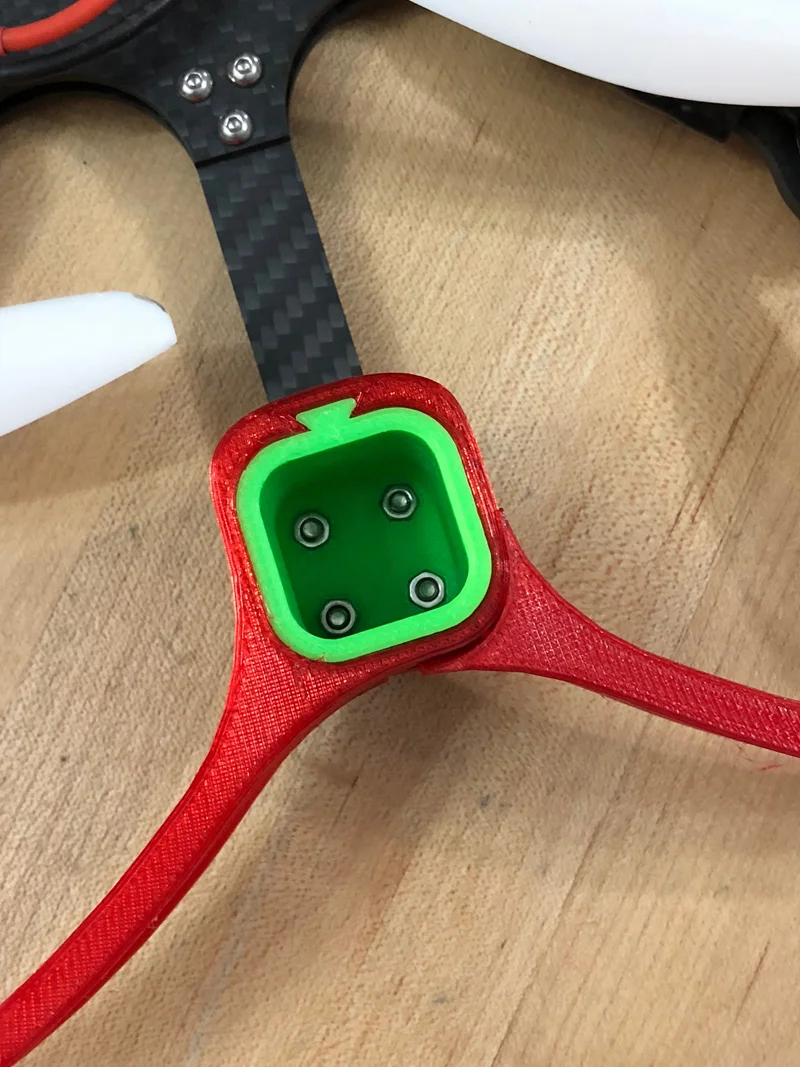
The pillars have embedded nuts to make installation easier.
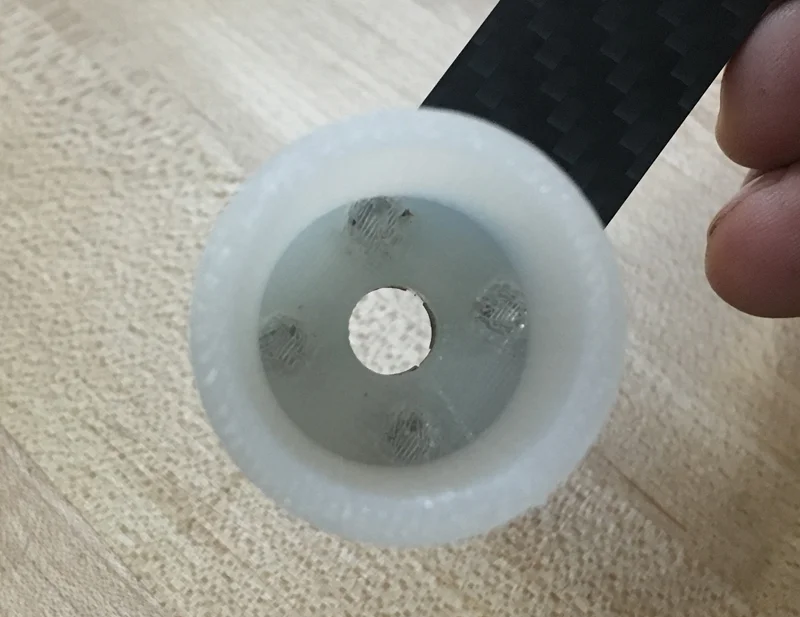
The propguards have half a collar so two guards can share one pillar, just alternate them facing up and facing down.

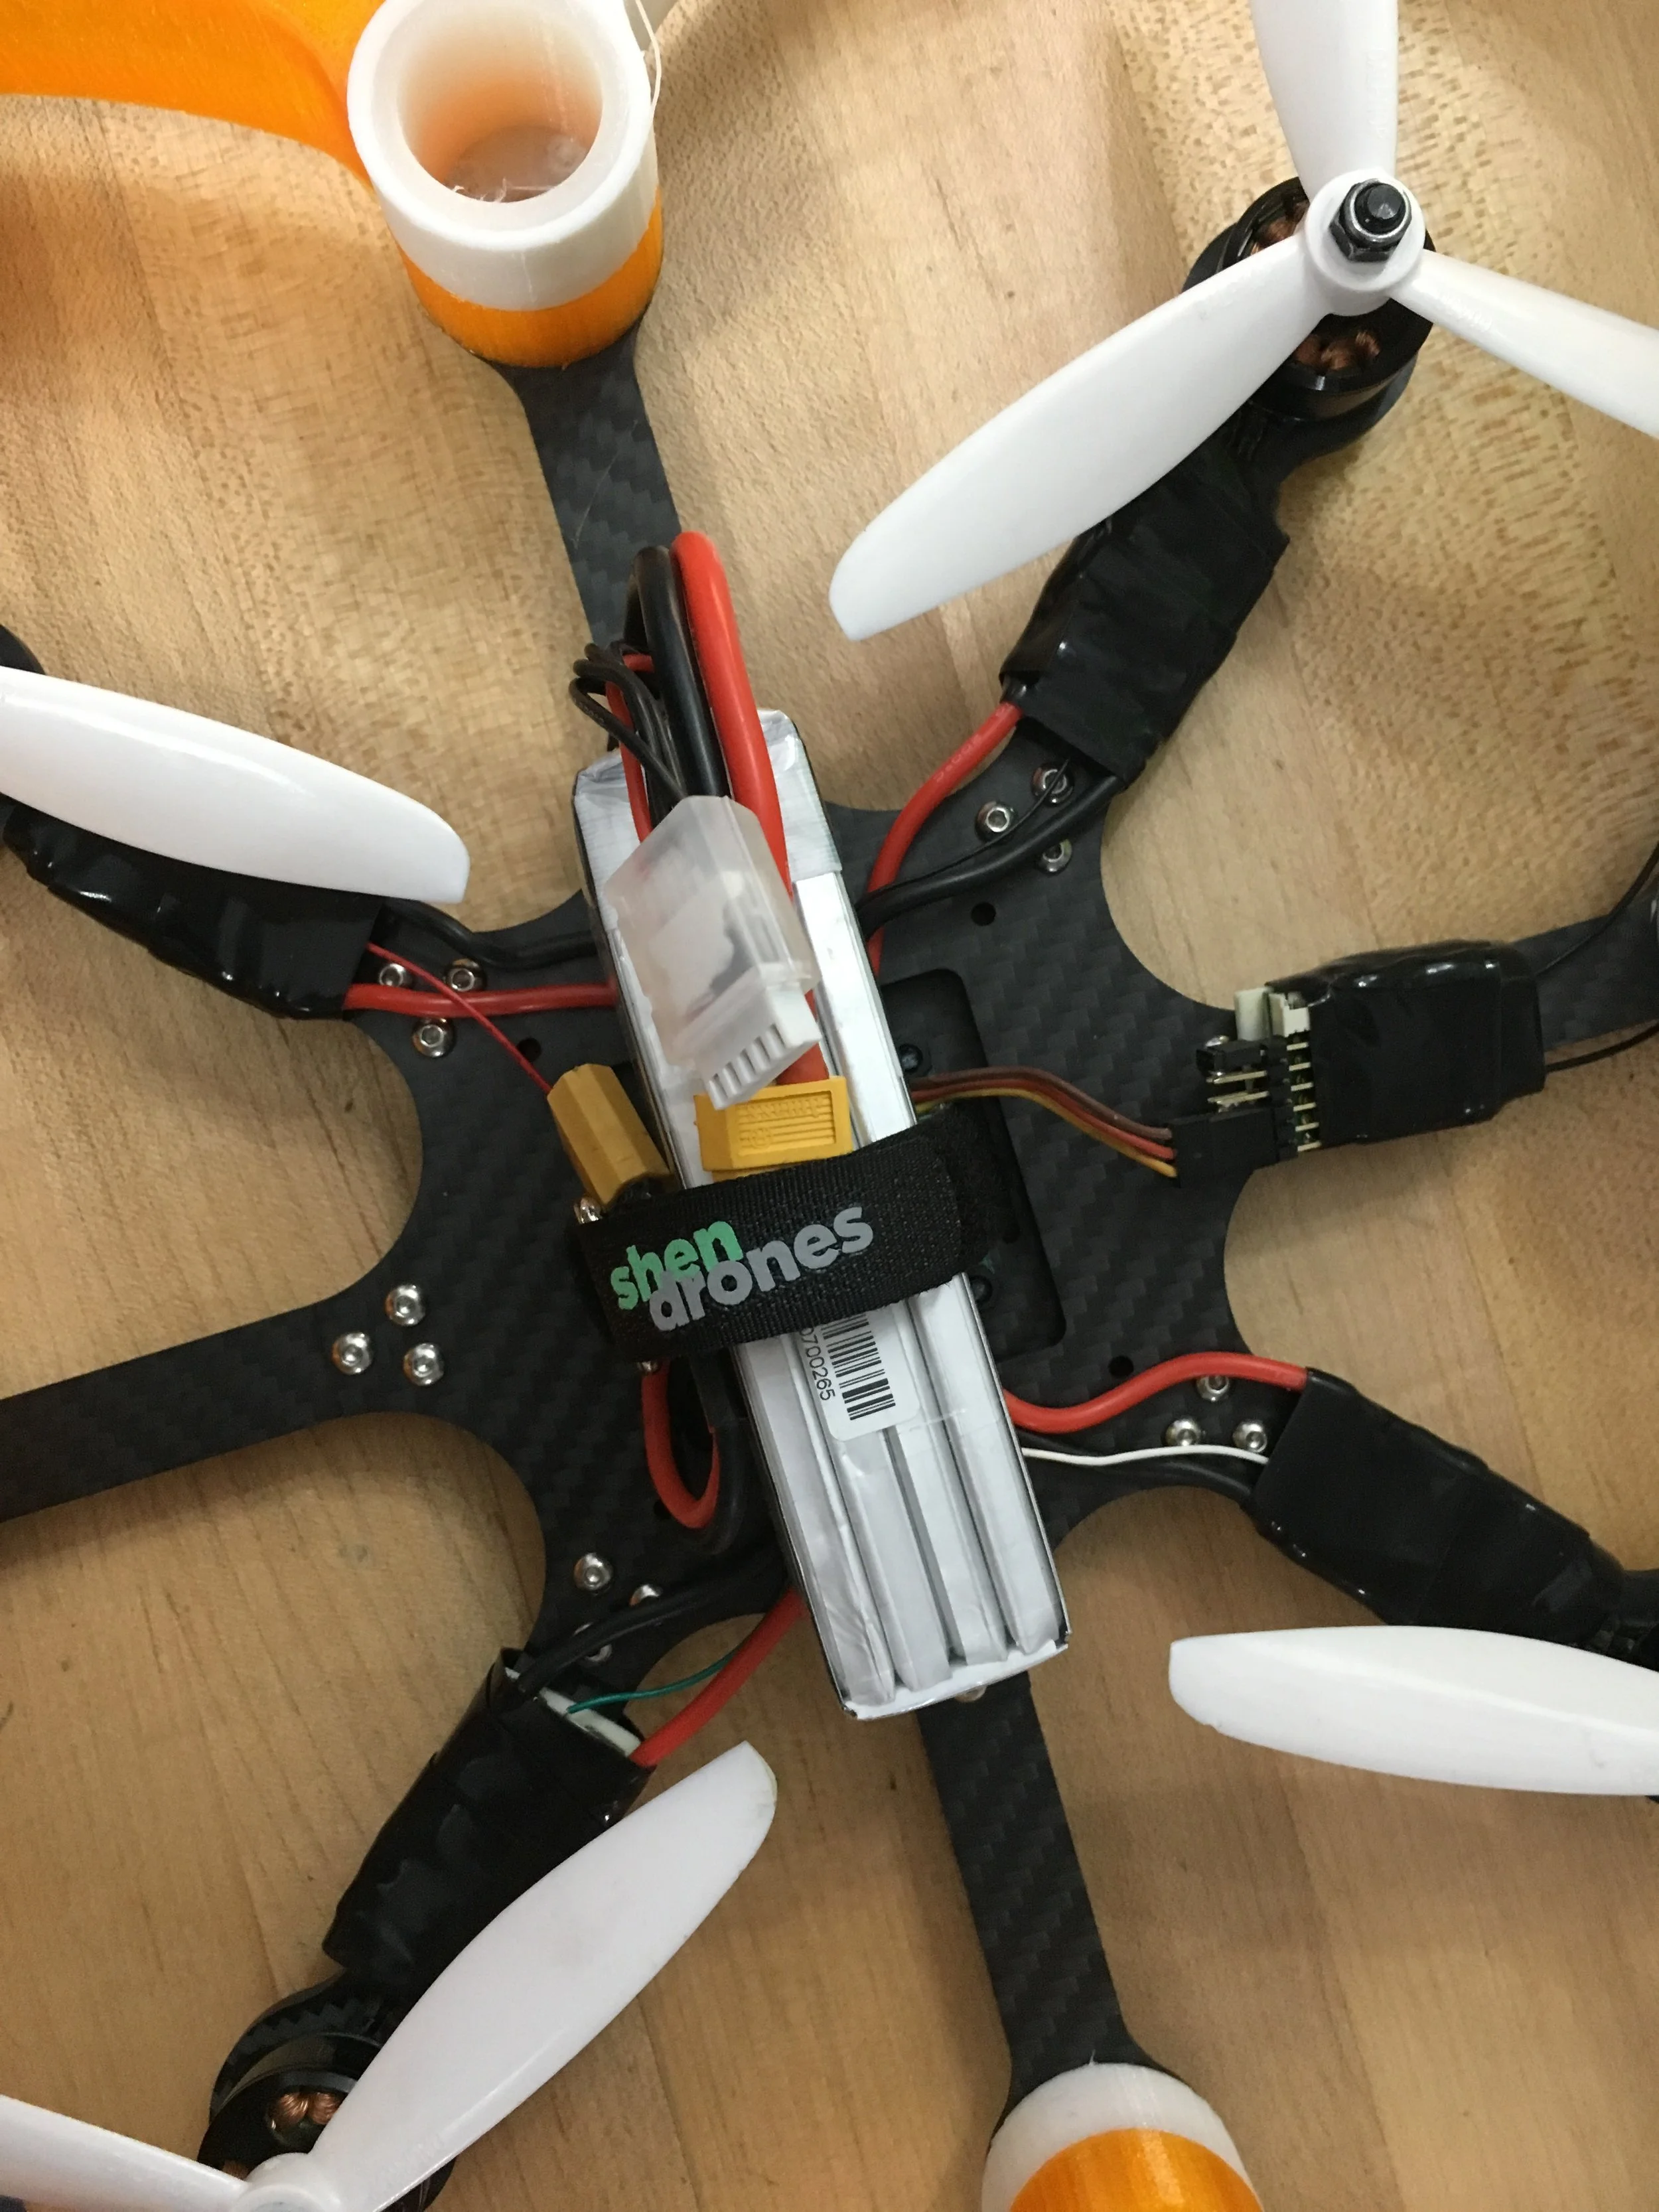
I took the parts off my 6" LDQ and moved them over. I was pretty surprised to find a set of Kiss 30's in that build!
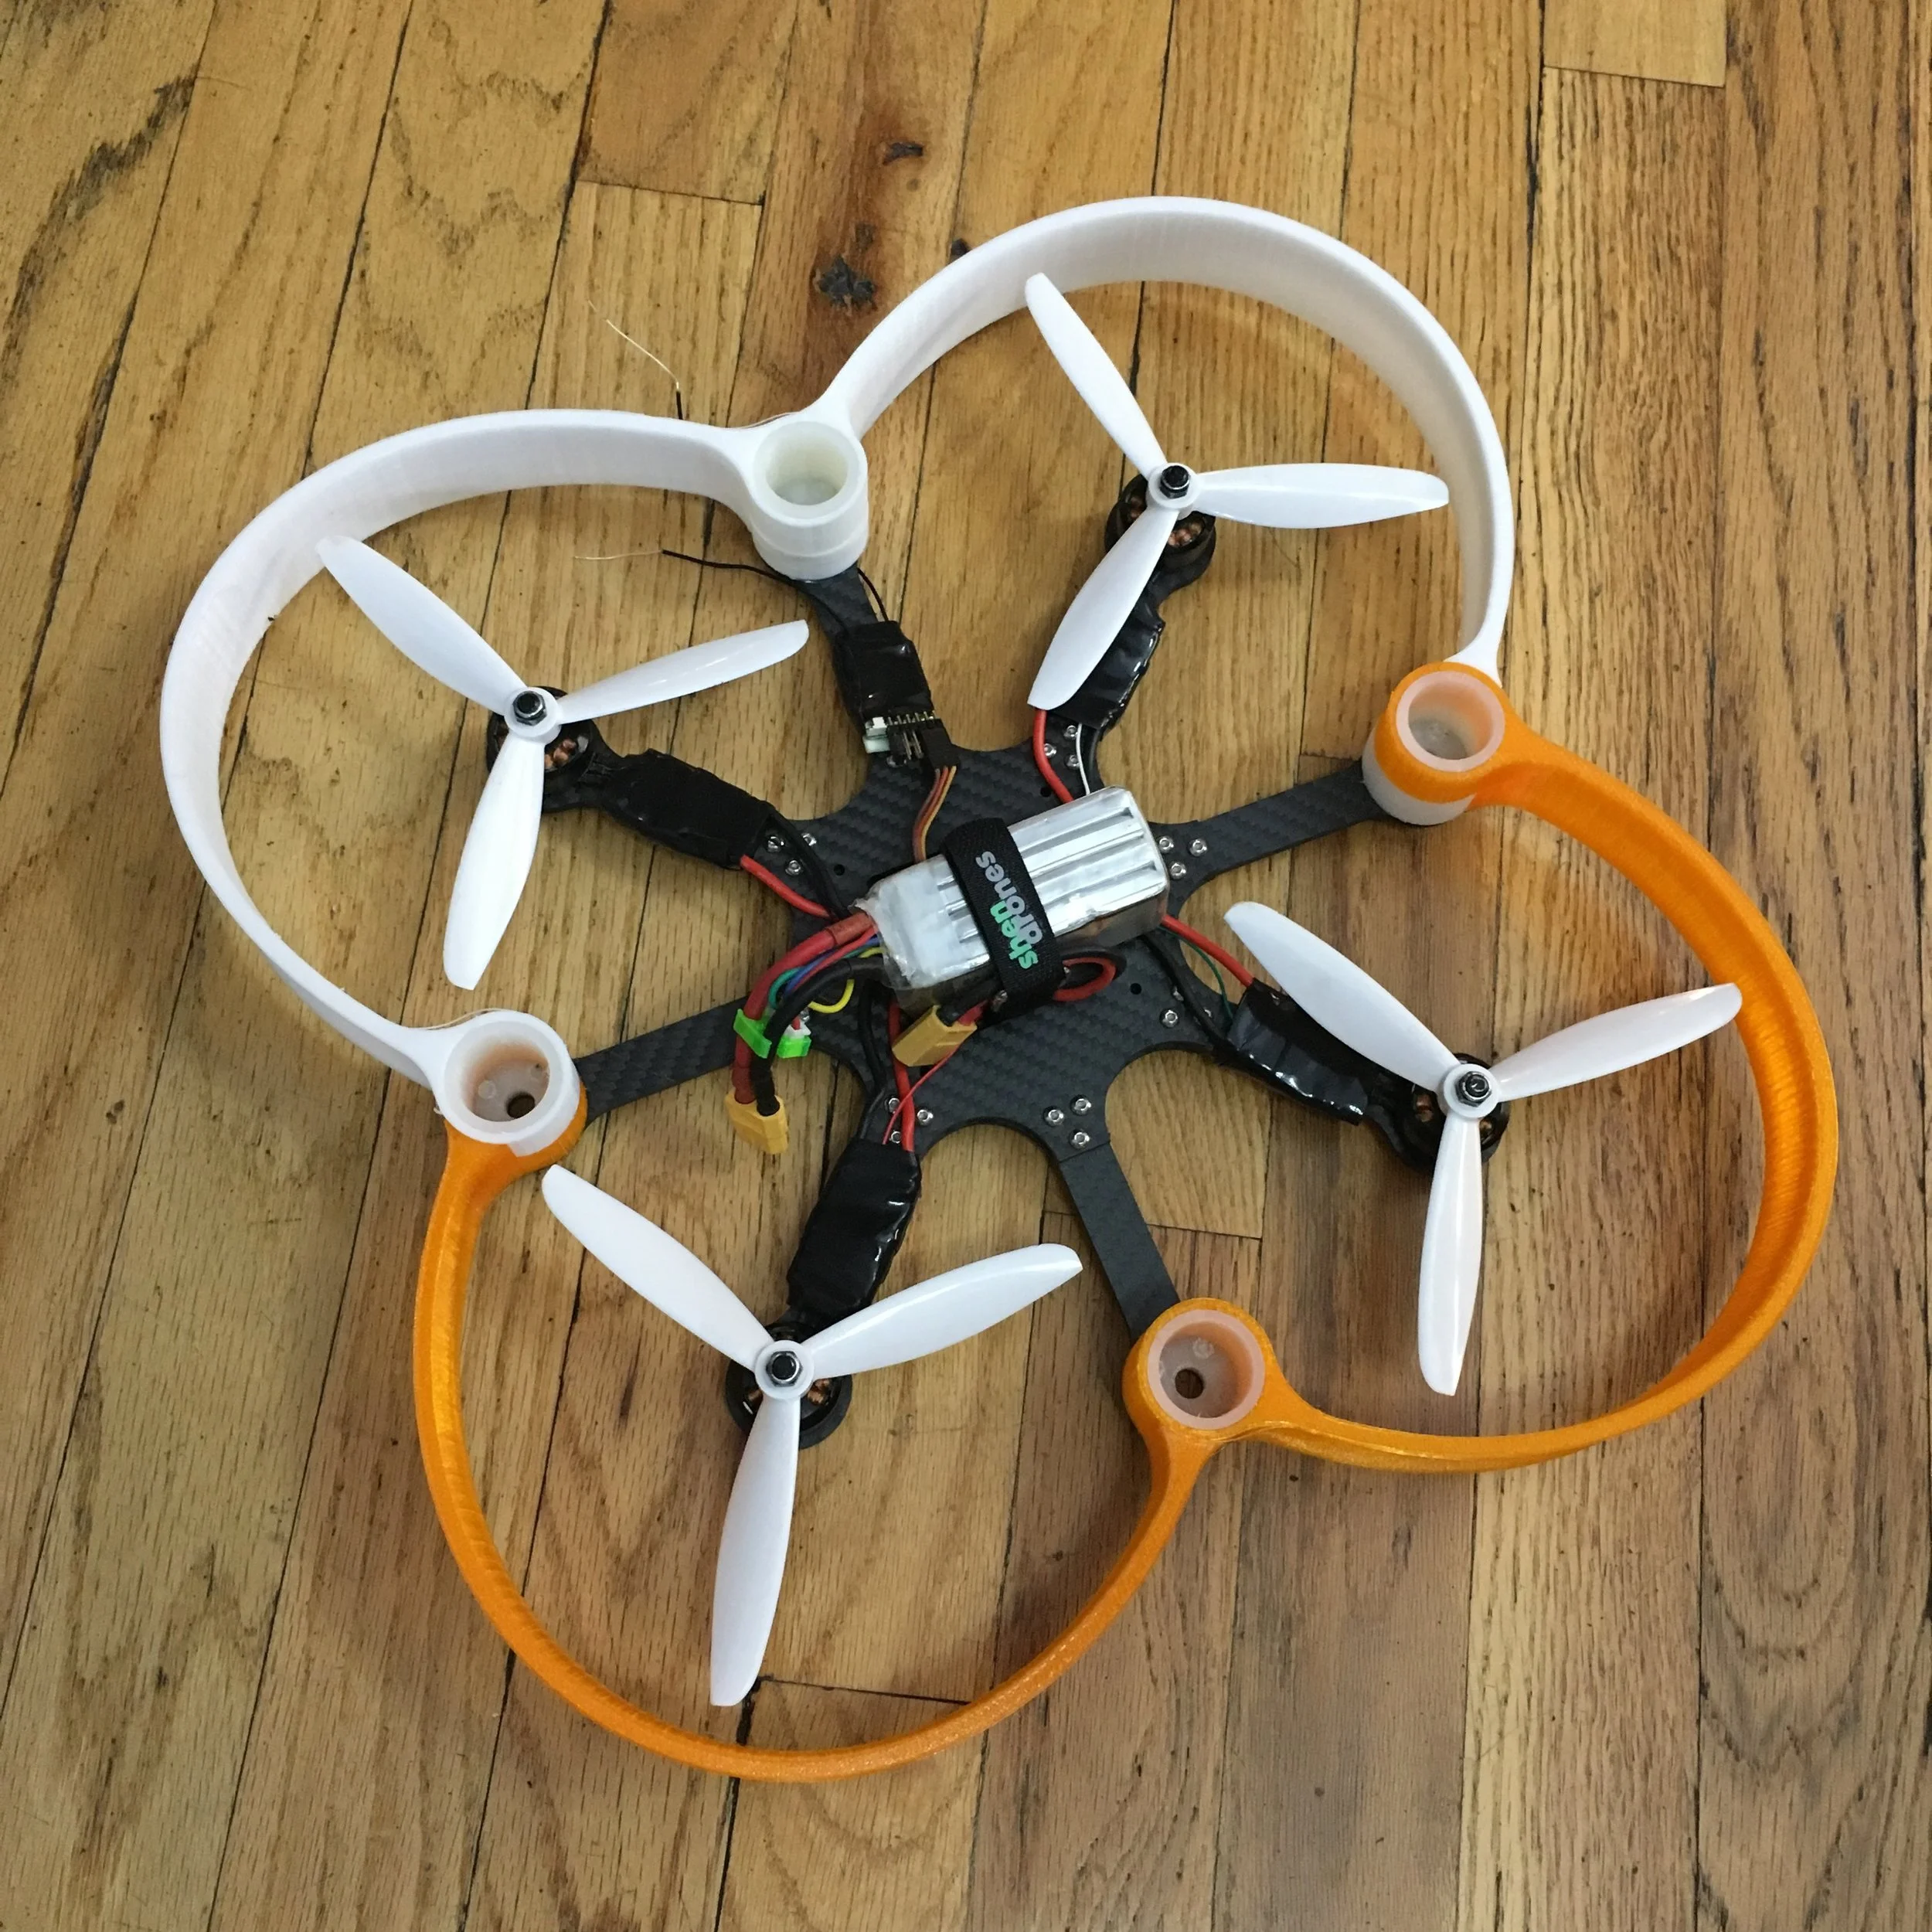
The battery rides above the FC. I was going to put some pads underneath, but the motor wires function just fine as padding.

One board, hidden in the 6mm recess. Yes, that's a DTFC. I built the LDQ^ a long time ago.
An 1800 just fits.
I hovered it around the house, bumped it against some stuff, then slammed it hard when a guard snagged on something. The guards spun around enough on the pillars to distort and get into the props, so this should fix that problem:

Square pillars lock the guards into one set contour, while allowing them to flex to absorb shock.
Now, I was able to print out the guards on my Wanhao i3, but just barely. I had to make the skirt offset just 2mm from the part, and even then it went off the edge of my bed. Andrew couldn't get it to work on his printer, so it was clear that any future user would probably have trouble with it. Since this part is meant for a flexible filament, I could squish the part down so it fits on a 200 x 200 bed. The problem is, how do you draw the part so that it expands into the proper shape?
I dug around Solidworks and accidentally stumbled onto the fact that you can measure the length of curves. So I redrew the part with the pillars set closer together, connected them with a curve of the same length, and voila, it stretches out when installed with the right clearance.

The new part works in real life, not in Solidworks.

It worked!
Andrew tested this in combat and found that the guards still spun on the square pillars, so I added a little key to the interface.
We also redesigned the guard to hold two optional carbon stiffening rods, as well as an led strip.
